Harley Paint Job
I Decide to Paint My Harley - 07/25/2009
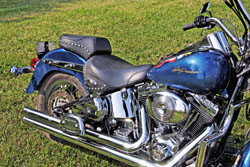
I’m a truck driver and I was laying around one weekend in my truck surfing the internet and came across the “Paint With Pearl” website and looked at their product. I had been wanting to have my 2004 Harley Heritage painted for sometime with a nice paint job better and more individualized than the stock paint job.
I have painted a few small jobs over 20 years ago and have done the prep work on my car and semi truck and watched my former painter neighbor spray them but had never painted with an HVLP gun or done a professional job by myself.
Reading about the “Paint With Pearl” products excited me and I convinced myself that I could paint my motorcycle myself. I already had an extra set of skins (fenders and tank) for my motorcycle and decided that if I screwed it up I could just work on it until I learned how to get it right without having my motorcycle out of service (I carry my motorcycle on my semi truck with me on the road.
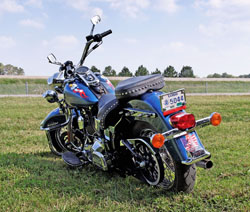
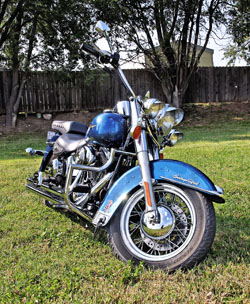
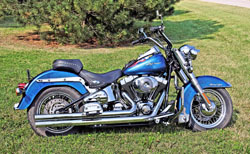
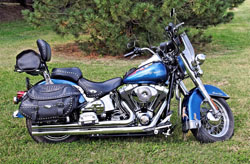
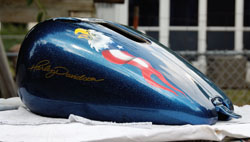
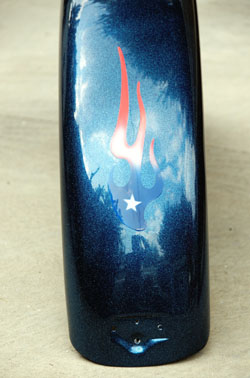
My motorcycle is a dark metallic blue and I wanted a lighter more metallic color with a lot of metal flake and a clearcoat like glass. I knew I couldn’t do the pin striping but decided I could find some vinyl graphics I could clearcoat over.
While surfing the “Paint With Pearl” website I saw a user picture of a motorcycle painted with the “Electric Blue Candy Pearl” that I liked and a dune buggy painted with “Strato Blue .004” Flake that I liked. I called “Paint With Pearl” and talked to a nice knowledgeable woman who told me that the “Electric Blue Candy Pearl” and the “Strato Blue” Flake were very similar in color and would mix together nicely. She also answered any questions I had at the time and mentioned some tips.
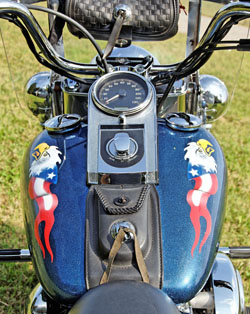
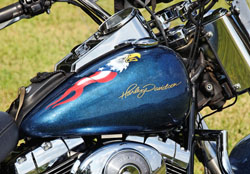
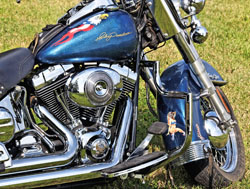
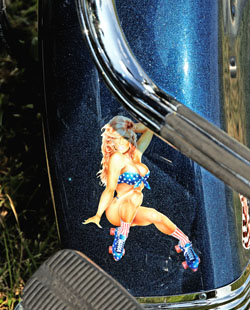
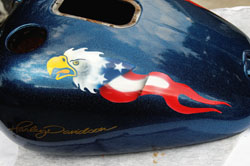
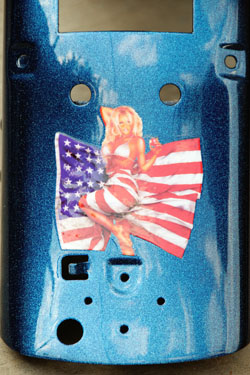
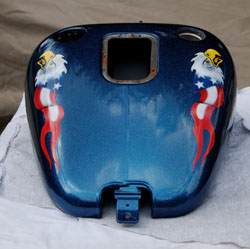
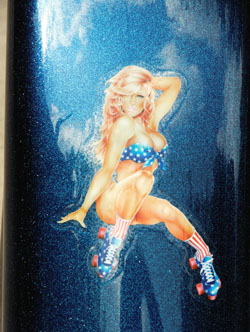
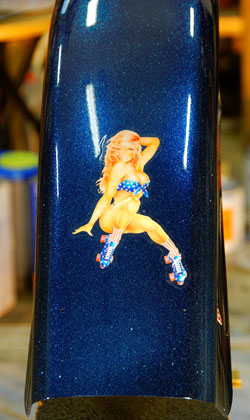
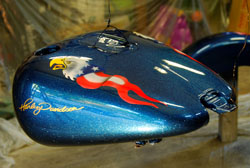
I ordered on line and received my product from “Paint With Pearl” very quickly. I also ordered some vinyl graphics from Purple Harley (good product, air brushed tank patriotic eagles and fender accents, reflective patriotic pinup girls on bottom sides of front fenders), Decal Site (good product, tank Harley Davidson script logo) and Sticker Giant (good product but not really made for clear coating over as the laminate over the vinyl is not flush to the graphic design. Vinyl is a little thicker. I was able to trim excess edges with scissors on one of the graphics. Patriotic pin up girls back of front and rear fenders.)
When I got home I started working on my project. All told I spent about 5 days painting my motorcycle; this included picking up the paint and supplies, pounding out a couple of small dents in the fenders, removing the Harley vinyl graphics, prepping for paint, painting a test panel, wet sanding down tank, fixing my mistakes, color sanding and buffing. Although I had a few problems in my project (my error not any of the products I was using) I am extremely pleased with the end result. Below are the details of my paint project.
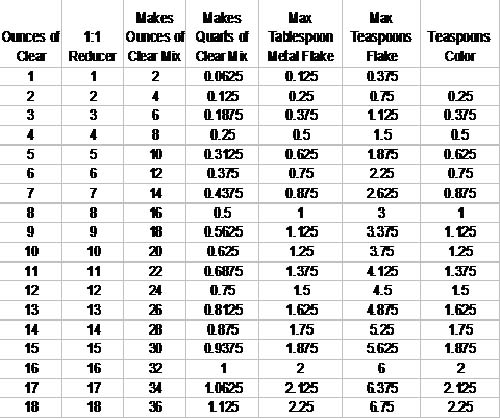
1. Taped off a front fender leaving a 6 inch by 2 foot area along the top of the fender to test paint. Painted the area with a spray can leaving 3 basecoat areas black, silver and white. I mixed up 8 oz (4oz DBC500, 4oz reducer) and added the Electric Blue powder and Strato Blue flake. (See my mixing table below.) I adjusted my Harbor Freight #43430 HVLP paint gun 1.4mm tip (bought on sale for $29.99) to the directions provided at Purple Sage Trading Post. Sprayed a light coat over the test panel and immediately came to the conclusion that the “Paint With Pearl” people were exactly right in saying to spray over a black base coat with this color of product. It is much too translucent to cover white or silver and achieve any kind of color. It did however cover the black base coat fine.
2. Prepped the metal using some DuPont acrylic primer I had left over from my semi truck two years ago. Went and picked up the rest of my paint as I now knew which color of base I needed. Paint supplier gave me a few tips including pointing out a good sealer primer to cover the acrylic primer for the PPG black base coat and talking me into using the DBC3000 clear instead of the DBC4000. I was worried it might flash too fast for me but was also worried about bugs and he assured me the DBC3000 would work better for me.
3. Tip: Bought a good air mask $20, Tyvek suit $5, paint hood $2 and box of 100 throw away rubber gloves from Harbor Freight. Good investment, kept my clothes, hair, skin, hands, nose and lungs clean.
4. Hung my parts from the 11 foot ceiling in my garage so that I could paint the tank top, bottom and sides and the fender so that could paint the underside lip before propping them on a couple of posts to spray the top and sides. I hung my gas tank from the garage door opener. PPG Sealer Primer: DP90LF, Catalyst DP402LF, Reducer DT870, Ratio 2:1:1/2. TIP: I forgot to blow off the garage door opener. Just as soon as I started spraying the sealer on the tank the air from the paint gun caused the tank to swing slightly which caused dust to fall down onto the top of the tank. Crud. Kept going sealing the fenders and applying the Deltron DBC2000 Black, DT 870 Reducer, Ratio 1:1 hoping the basecoat would cover the dust spots as they were small. Nope.
5. Had a 24 hour window to apply either a basecoat, intercoat or clear coat. At 8am the next morning (14 hours later) I wet sanded the basecoat down on the tank and had to sand into the non sanding sealer to get the dust spots out.
6. Hung the tank and mixed more sealer. Didn’t have my gun set right and orange peeled the hell out of the gas tank. Tip: Always shoot test onto something like masking paper taped to a big cardboard box. I reduced the sealer and adjusted the gun and shot another wet coat hoping to flow it out a little. It helped but still had orange peel. Let it set an hour and then mixed the PPG Deltron DBC500 Color Blender, DT 870 Reducer, Ratio 1:1 and the Electric Blue Candy Pearl and the Strato Blue Flake using the ratio of 8oz DBC500: 8oz Reducer: 1 Tablespoon Flake and 1 Teaspoon of Color using the following table I made:
|
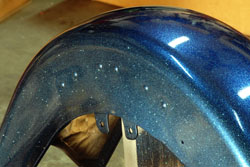
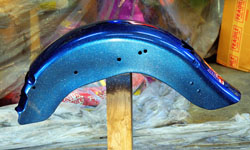
7. Adjusted the gun to about a 6 inch fan and a light material volume and sprayed a tack coat of colorized DBC500 on the tank and fenders. Kept the 6 inch fan (motorcycle parts, less material overspray) and adjusted the material volume to a medium coating and sprayed the tank and fenders with 3 coats, about 5 minutes between coats. I think 3 coats, might have been 2 plus the tack coat, I sprayed the bottom edge of the front and sides of the tank lightly on purpose to achieve a darker fade effect. I could have mixed more blue color into the DBC500 or shot another coat for a more opaque effect but I achieved pretty much the color effect I wanted. I’m glad I shot the color test to find out how the product covered before trying to paint my actual parts.
8. Sprayed 2 light to medium coats of PPG DBC3000 Clearcoat, DCH3070 Hardener, Ratio 4:1 on the tank and fenders. Sprayed two more coats of wet on the tank as I could see the orange peel and knew I was going to have to sand it.
9. That night applied vinyl graphics to the fenders. The next morning I dusted the tank with primer and color sanded the clear and applied the vinyl graphics to the tank.
10. Waited until 4pm for the end of my 24 hour window to recoat and sprayed 2 very light tack coats of clear on all parts. Readjusted paint gun to a 12 inch fan, increased the air to the gun about 8 lbs (12 inch fan to let me fog the clear in and increased pressure to bring the gun pressure to around 10lbs at the cap to finely atomize the clear.) and adjusted the volume to a medium coat to allow me to paint at a medium speed to better control the volume of clear on the parts. Sprayed 6 coats of clear on the tank and fenders in a series of 2 coats about 3-5 minutes apart then waiting about 30 minutes to allow the solvents to aerate then another 2 coats to a total of 6 coats. The paint looked fantastic, the tank was like a sheet of glass and the fenders only had just a few very light spots of orange peel (didn’t color sand the first clear coats) visible only in certain light.
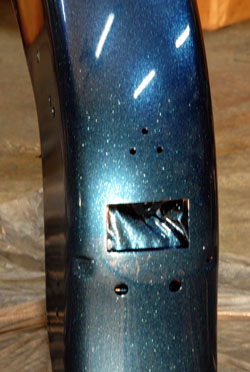
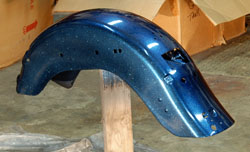
11. Left garage for 30 minutes to let the parts dry enough to open the garage door to let it air out. Came back and found 2 small gnat like bugs in the gas tank, 2 in the rear fender and 1 on the front fender. Crud. Other than that the paint looked fantastic. The color was just as I wanted and the metal flake was impressive. Note: the flake is light enough to stay suspended in the paint. I just swirled the paint gun around ever now and then when I paused my painting to keep them well mixed. The metal sprayed out evenly with no trouble for me.
12. Let parts hang the next day to cure while I thought about the bugs. They were very small and I didn’t want to have to clear coat again. Later the next night (about 27 hours after painting) I wet a 1500 grit piece of sandpaper and lightly sanded out the bug on the top of the tank. As it was in the top of the clear it came out easily and using 3M rubbing compound and a foam pad at about 1500 rpm I set the grinder down lightly over the sanded spot for about 10 seconds. Bug was gone! Finish was like glass matching the undisturbed clear coat. Cool.
13. One more day. Paint on parts about 40 hours old. Decided to sand out the light orange peel on the fenders as well as get rid of the 4 or 5 bugs or dust in the fenders. Fogged the fenders with primer and wet sanded them out with 800 grit over the orange peel then sanded with 1500 grit and finished with 2000 grit. Sanded pretty easy, maybe 3 hours or so. Buffed with 3M rubbing compound at about 1800 rpm and a 3M rounded white honey comb foam pad. Amazed at how fast they buffed. Couldn’t see any swirl marks but went ahead and quickly buffed fenders with 3M swirl remover and a 3M black honey comb foam pad. All parts are like glass now with a mirror like wet look.
Pictures - Click here to jump to paint pictures.
Note about pictures of painted parts:
-
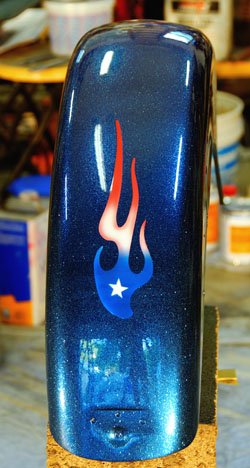
Iridescent color shift from blue to green under certain lighting.
-
All parts are the same color. Some of the pictures show parts as different colors due to the way the light is striking them as well as the fact that there is mixed lighting shining on them.